

Cold Brew Coffee: How to Make It at Home
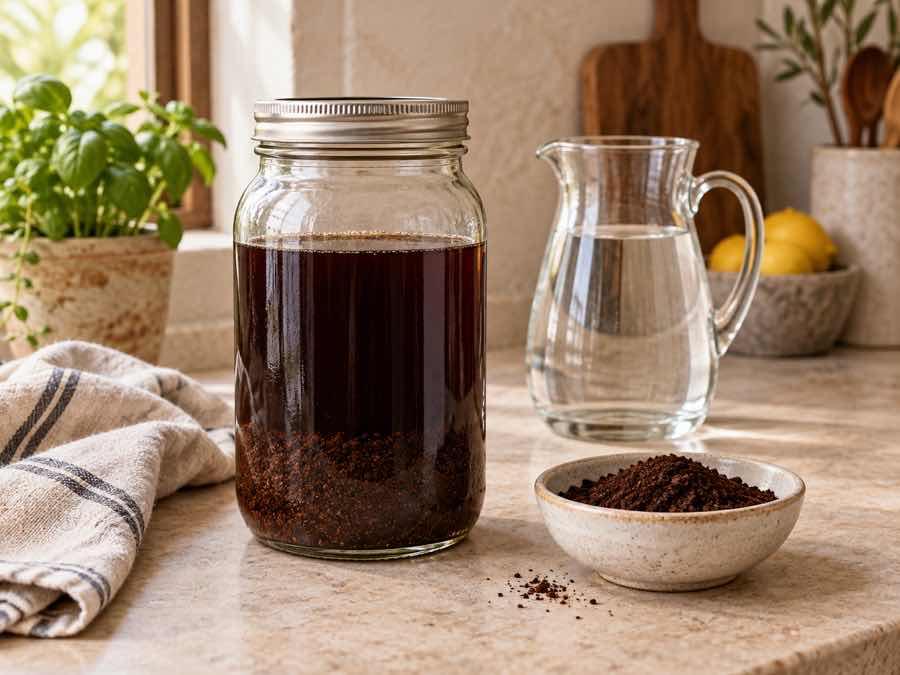
Cold brew coffee is coffee extracted by steeping ground beans in cool water for several hours, then filtering out the grounds. It is often served over ice, but the brewing method is what makes it cold brew: ordinary iced coffee starts with a hot brew.
A jar, coffee, water, and a filter are enough to get started. The useful decisions are how strong to brew it, when to strain it, and how much water or milk to add to the glass. Get those choices right for your taste, and tomorrow's coffee is mostly a matter of pouring.
What Is Cold Brew?
Cold brew uses a long contact time between water and ground coffee. Many home methods take roughly 12–24 hours, although the right time varies with grind size, temperature, equipment, and the recipe. Refrigerated brewing usually needs more patience than a warmer steep.
The resulting drink can taste rounded and mellow, with the particular beans contributing chocolate, nut, fruit, or roasted notes. These are tendencies, not promises: cold brewing does not remove every trace of bitterness or make all beans taste alike.
Cold brew also does not automatically mean concentrate. A batch made with more coffee relative to water may need dilution; a lighter recipe may be ready to pour. For example, Blue Bottle's cold brew bottle method makes coffee for serving over ice, while other brewing systems deliberately produce a concentrate.
Cold Brew vs Iced Coffee
The main difference is the temperature used to extract the coffee. Starbucks' explanation of cold coffee methods makes the same distinction: iced coffee is brewed hot, while cold brew is extracted slowly in cold water.
|
Detail |
Cold Brew |
Iced Coffee |
|---|---|---|
|
Brewing method |
Grounds steep in cool water |
Coffee brews with hot water, then cools |
|
Planning |
Usually made hours ahead |
Can be made shortly before serving |
|
Typical flavor |
Often mellow and rounded |
Often brighter, with more hot-brew character |
|
Strength |
Ready to drink or concentrated, depending on the recipe |
Depends on brewing strength and melted ice |
|
Caffeine |
Varies with beans, dose, extraction, dilution, and serving size |
Varies with the same factors |
|
Best fit |
Preparing a batch ahead of time |
Making a fresh cold drink without an overnight wait |
Choose cold brew when you want coffee waiting in the refrigerator. Choose iced coffee when you want a drink now or enjoy the character of your usual hot brew. Neither method guarantees a better cup; the recipe and your preferences matter more than the label.
How to Make Cold Brew Coffee at Home
Start with a small batch so you can adjust the next one without wasting much coffee. This jar recipe is a practical starting point, not a fixed standard for every bean or brewer.
-
Base recipe: 60 g coarsely ground coffee + 720 mL cold drinking water. Refrigerate for about 18–24 hours, then strain and taste before adding more water.
-
Hands-on time: About 10 minutes, plus filtering.
-
Brew ratio: 1:12 by weight.
-
Yield: Less than 720 mL of filtered coffee because the grounds retain water; measure the finished batch rather than assuming an exact yield.
What You Need
-
60 g coffee, ground coarse enough to show distinct particles rather than powder
-
720 mL cold drinking water, filtered if your tap water has an unwanted taste
-
A clean jar or covered pitcher with at least 1 liter of capacity
-
A kitchen scale and measuring jug
-
A fine-mesh strainer and a paper coffee filter
-
A clean, covered container for the strained coffee
Use a coffee you already enjoy. A medium roast is a reasonable starting choice if you want balance, but there is no special bean required for cold brew.
1. Weigh and Combine
Put the grounds into the jar, add the water, and stir gently until all the coffee is wet. Check for dry pockets floating at the surface. Leave enough space to stir and close the lid comfortably.
2. Cover and Refrigerate
Put the covered jar in the refrigerator. Begin checking the flavor around 18 hours by straining a small sample. If it tastes thin or undeveloped, allow more time within the suggested 18–24-hour window.
Keep a note of the coffee, grind, and steeping time. A repeatable starting point is more useful than changing everything with each batch.
3. Strain Without Forcing the Grounds
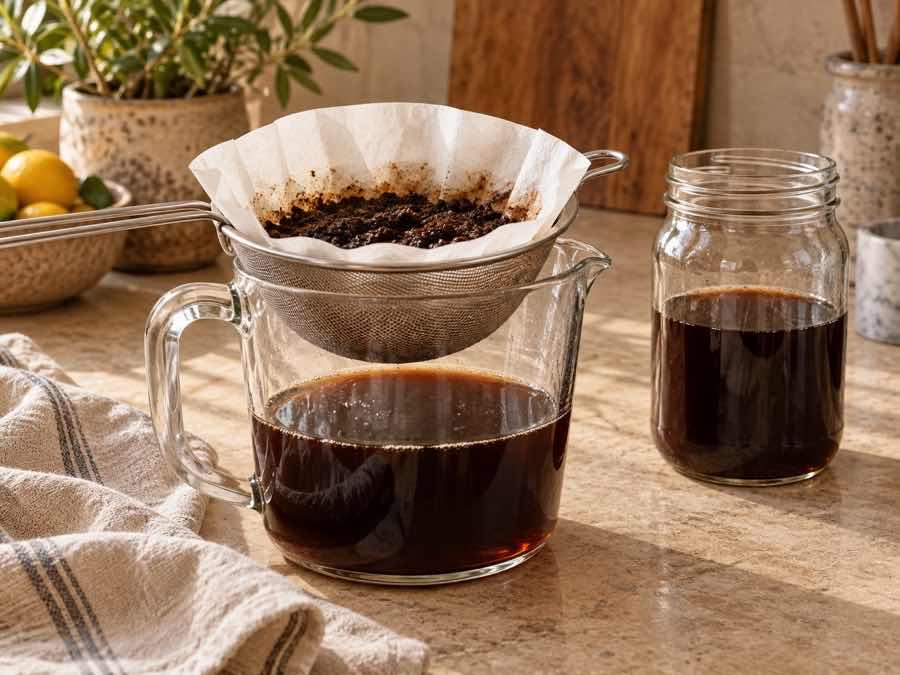
Pour through the strainer to remove the larger particles. For a cleaner texture, pass the liquid through a paper coffee filter supported in a suitable dripper or strainer over a receiving vessel. Work in batches if needed and allow it to drain naturally.
Avoid squeezing the grounds or overfilling the filter. Fine particles can slow the process; patience here gives you a less gritty glass.
4. Taste Before Adding Ice
Try a small amount of the strained coffee first. This base recipe is intended as a starting point for direct serving, so it does not need an automatic equal-volume addition of water. If it tastes too intense, add a little water or milk, taste again, then pour over ice.
5. Store the Batch Plain
Transfer the strained coffee to a clean, covered container and keep it refrigerated. Make a batch you will finish promptly, label the brewing date, and add milk or syrup to individual servings. A homemade jar batch does not inherit the shelf life printed on a sealed commercial bottle.
If you use a dedicated brewer, follow its cleaning and storage instructions. Discard coffee with mold or an unusual odor; the absence of those signs is not proof that an improperly stored batch is safe.
Cold Brew Ratios: Ready to Drink or Concentrate
A ratio is useful only if you know what it measures. Here, 1:12 means 1 gram of dry coffee for every 12 grams of brewing water. For kitchen measuring, 1 mL of water is approximately 1 g. Do not substitute cups of coffee grounds for grams: their volume changes with the grind and roast.
|
Goal |
Starting Brew Ratio by Weight |
Example Batch |
How to Serve |
|---|---|---|---|
|
A lighter batch for direct serving |
1:12 |
60 g coffee + 720 mL water |
Taste first; add water or milk only as needed |
|
A concentrate for mixing |
1:6 |
100 g coffee + 600 mL water |
Try equal volumes of strained concentrate and water, then adjust |
These are starting formulas, not universal definitions of drinking strength. Brewer instructions can differ substantially.
For a simple concentrate serving, mix 100 mL strained concentrate with 100 mL water before adding ice. For a milk version, replace some or all of that added water with milk. Adding both the full water amount and a large pour of milk will make a lighter drink.
The brew ratio describes what went into the jar. It does not tell you the exact volume recovered, the concentration of dissolved coffee, or the caffeine in the finished drink. Likewise, a 1:6 batch diluted with an equal volume of water is not guaranteed to taste identical to coffee brewed directly at 1:12.
Adjust the Flavor One Variable at a Time
Choose Beans for the Glass You Want
Start with tasting notes you already like. Chocolate or nut notes can work well in a milk drink; fruity beans are worth trying if you prefer your coffee black. Do not buy an expensive bag just because it says “cold brew.” Record what you used so a good batch is easy to repeat.
Separate Strength From Extraction
A coffee can taste too concentrated even when its flavors are pleasant. Try dilution before deciding that it brewed too long. If it remains harsh after dilution, adjust the grind, steeping time, or bean choice on the next batch.
|
What You Notice |
What to Try |
|---|---|
|
Pleasant flavor, but too intense |
Add a small measured amount of water |
|
Thin after milk and ice |
Use less added liquid, or try the concentrate option next time |
|
Gritty texture |
Filter through paper and avoid disturbing settled sediment |
|
Slow or clogged filter |
Strain coarse particles first; use smaller filtering batches |
|
Harsh or drying finish |
Try a shorter steep or a coarser grind next time |
|
Weak flavor before dilution |
Check the coffee dose and saturation; adjust time or grind on the next batch |
Keep Caffeine Claims in Perspective
A bold taste is not a caffeine measurement. The beans, amount of coffee, extraction, serving volume, and dilution all affect what ends up in the glass. Cold brew can contain more or less caffeine than iced coffee; there is no single number that applies to every homemade batch.
Adding water lowers caffeine concentration per milliliter, but it does not remove caffeine from the concentrate you poured. If you drink the entire diluted serving, you still consume the caffeine in that original portion.
Serve It Black, With Milk, or With Vanilla
Taste the coffee on its own before sweetening it. Then decide whether you want to soften the finish, add sweetness, or simply keep it black.
For a vanilla milk variation, start with:
-
180 mL of the ready-to-drink cold brew above
-
30–60 mL milk or oat milk, to taste
-
An optional 1/2 teaspoon of Tahitian Vanilla syrup
-
Ice
The optional syrup comes from Como Speziale, an Italian-inspired syrup and lifestyle brand. Stir the syrup into the coffee, add the milk, and taste before pouring over ice. Add more syrup a little at a time if you prefer a sweeter drink.
Liquid flavoring is an easy way to use coffee syrups beyond lattes, especially when you want a hint of vanilla without a large amount of milk. Keep the coffee recognizable and let the flavor accent it.
Make Your Next Batch Easier
Good cold brew starts with a clear recipe: weigh the coffee, measure the water, filter carefully, and adjust the finished glass before changing your brewing method. Once you find the strength you enjoy, write down the proportions so the next batch is easy to repeat.
For mornings when you want a vanilla finish, a small optional pour of Como Speziale syrup makes the same batch feel a little different without complicating the preparation.


Comments
No comments yet. Be the first to share your thoughts!